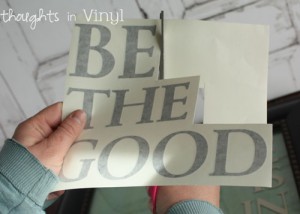
Step by Step Instructions for Be the Good
Item #CK318 Order yours here
Each vinyl piece comes in three parts:
- The application tape (the top most layer)
- The vinyl lettering itself
- The backing paper (the bottom layer)
Step 1
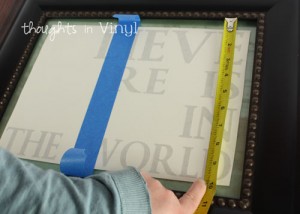
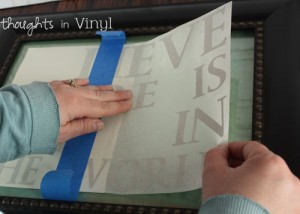
Tape the larger vinyl piece to your surface, by running a strip of tape through the center of the saying. Then adjust tape until saying is straight on your surface.
Measure to the left and right, adjust until it is centered.
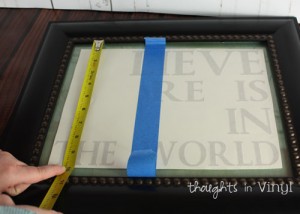
Measure from the top of your surface to the bottom of the lettering (as shown in the pictures).
(if you are applying your saying to the wall, then you can use a level and place it against your lettering and adjust the lettering until it is level on the wall, then tape in place)
Step 2
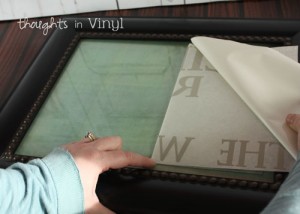
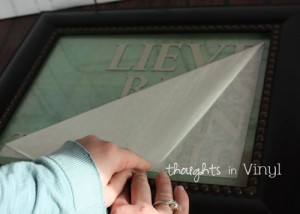
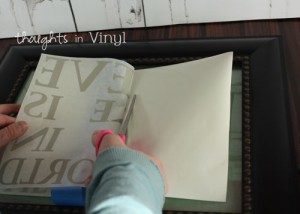
Starting at the right, lift up the application tape slowly, this will lift up the vinyl lettering as well. Go slowly to make sure all vinyl lettering is stuck to the application tape. If a part of the vinyl is left on the backing paper, then rub the application tape and this will help release the vinyl from the backing paper.
Lift up the application tape (and vinyl lettering) to the center of the saying where the strip of tape is. Then cut away the backing paper that is free of the vinyl lettering (as pictured below)
Step 3
Starting at the center, where the tape is, smooth the vinyl and application tape down to your surface. Smooth from the center to the right hand side. Rub gently; you can use a credit card to rub the application tape.
Step 4
Remove the blue tape. The application tape is sticky, so this will hold your saying in place.
Step 5
Starting at the center of the saying, remove the backing paper releasing the vinyl on to the application tape (like in step 2).
Then repeat step 3 and this time smooth from the center to the left side of the saying.
Step 6
Slowly peel up the application tape leaving the saying on your surface.
Step 7
Now, cut away the excess space from the “Be the Good” vinyl piece. (As shown in the picture)
Step 8
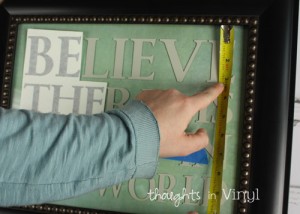
Tape the “Be the Good” vinyl piece to your surface. Now, measure down to the bottom of the “E” at the end of the word “BELIEVE”
Step 9
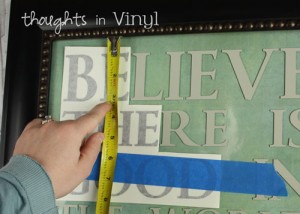
Measure down to the bottom of the “E” in “BE” as shown in the picture. Adjust tape on the phrase “be the good” until the measurement to the bottom of the “E” in “BE” is the same measurement from step 8.
Step 10
Make sure that there isn’t too much space between the “BE” and the “LIEVE”. Adjust if needed (and recheck your measurements to the bottom of the “E” to make sure it didn’t move during your adjustments)
Then repeat steps 2-6 to transfer the vinyl to your surface.

