


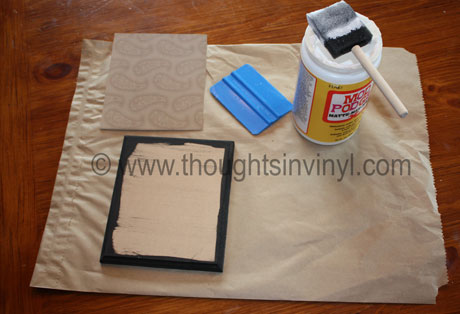
Modpodge Step by Step
Gather your supplies.
-wood (or other surface to want to apply modpodge to)
-foam brush
-modpodge (I perfer the Matte finish)
-flat edge (you can use a credit card or even a plastic pancake turner)
-scrapbook paper cut to size (I cut mine about an 1/8″ – 1/4″ larger than the board and sand the excess off)

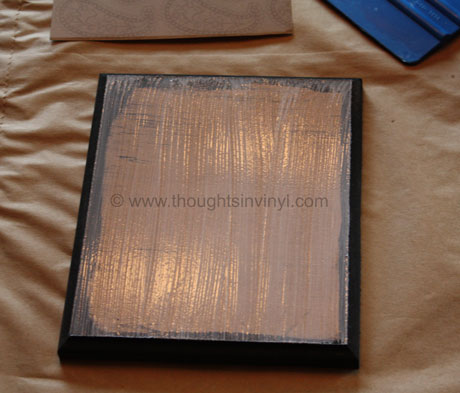
Step 1: Brush on an even layer of modpodge to your surface.
This is what holds your paper on to the board, so make sure to apply enough. You don’t want it too thick or your scrapbook paper will rip when you smooth it down.
Lay your precut piece of scrapbook paper on top of the modpodge. I generally cut my scrapbook paper slightly larger then my surface that I am applying it too (about a ¼” larger than needed). Then once the modpodge has dried I sand off the extra paper with sand paper to ensure a perfect fit.
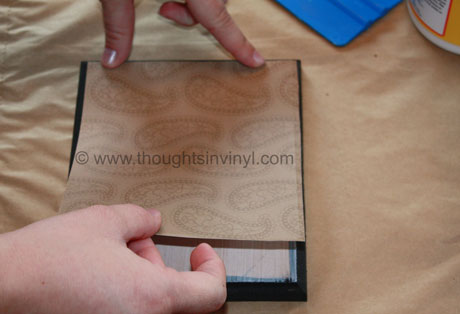
Press the paper down with your hands and smooth it out.

Then using your flat edge (credit card, plastic pancake turner, etc) at an angle, rub the scrapbook paper down onto the modpodged surface (board or metal, etc).

Start in the middle and work your way out. This will push the extra modpodge out from under the paper and it also releases all the air pockets from being trapped under the paper as well. Wip away the excess modpodge with a paper towel before it dries.
This step helps eliminate the bubbles under your paper once the modpodge has completely cured. Continue to rub the paper with your flat edge for 30-60 seconds to insure that you have a good bond between the paper and what you are modpodging it to.
Then sand if needed to remove the overhanging paper (if you cut it slightly larger than your surface).

Wait about 20-30 minutes and then apply your vinyl lettering ontop of your modpodged surface.
You can also apply a thin layer of modpodge over the top of your finished craft to seal the paper.